PA Subscriber Guide: Difference between revisions
No edit summary |
No edit summary |
||
| Line 70: | Line 70: | ||
To create a Webmail User in Open-Xchange, a service user must exist or be created. We assume there's no service user yet and thus | To create a Webmail User in Open-Xchange, a service user must exist or be created. We assume there's no service user yet and thus | ||
will create one. Go to the Users tab and click on ''Add New Service User'' | will create one. Go to the Users tab and click on ''Add New Service User'' | ||
* In the first step, check E-Mail and Open-Xchange | |||
[[Image:Create Service User Part 1.png|800px]] | |||
* Chose an E-Mail address | |||
[[Image:Create Service User Part 2.png|800px]] | |||
* Select the Service Template to use | |||
[[Image:Create Service User Part 3.png|800px]] | |||
* In the final Open-Xchange part, use the same E-Mail address as in part 2 | |||
[[Image:Create Service User Part 4.png|800px]] | |||
Revision as of 08:44, 29 October 2013
Open-Xchange Parallels Automation Subscriber Guide
This guide describes how to integrate Open-Xchange services into the Customer Control Center.
About Open-Xchange Services
OX App Suite is a centralized cloud environment that lets you take control of your digital life from anywhere:
- It provides and centralizes email, contacts, calendar and tasks.
- It provides cloud based file storage and document management/viewing/editing.
- It provides a digital life management portal that lets you access all this and more regardless of device or operating system.
The Open-Xchange APS package allows customers to create an Open-Xchange context and Webmail Accounts within that context.
Audience
This guide is for users of Open-Xchange services looking to understand more information on how the Open-Xchange APS package operates.
Terms and Abbreviations
- CCP
- Customer Control Panel
- Context
- In Open-Xchange, a Context is a container for one or more users. Usually one Context contains one domain..
Configuration Overview
With the aid of the Open-Xchange Configuration option you can see common information about your Open-Xchange service and configure general settings of the service. This includes defining all the domains propagated to Open-Xchange and used for mailboxes, distribution lists and so forth. Also here you can create new service users and change setting specified to the service.
Typical Scenarios of Open-Xchange Usage
Open-Xchange Context creation
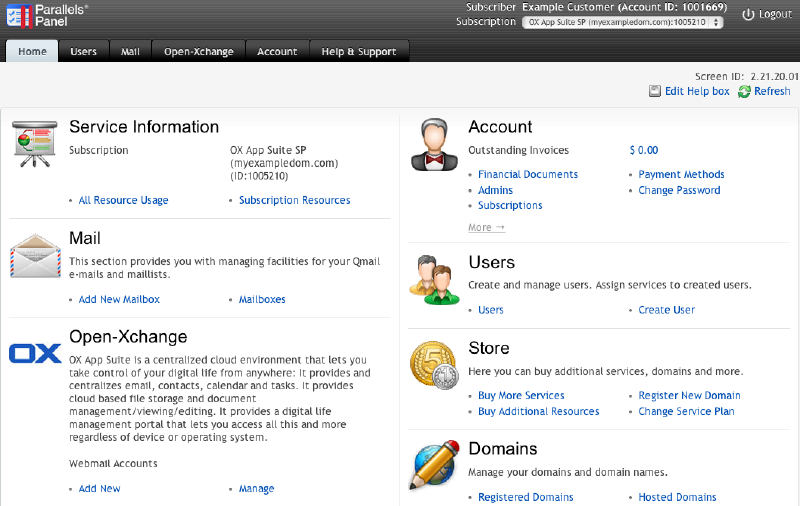
The SMB’s account administrator will login to the Parallels Automation CCP using the login credentials created during their initial purchase. After login, the account administrator will select the Open-Xchange subscription if it is not already selected.
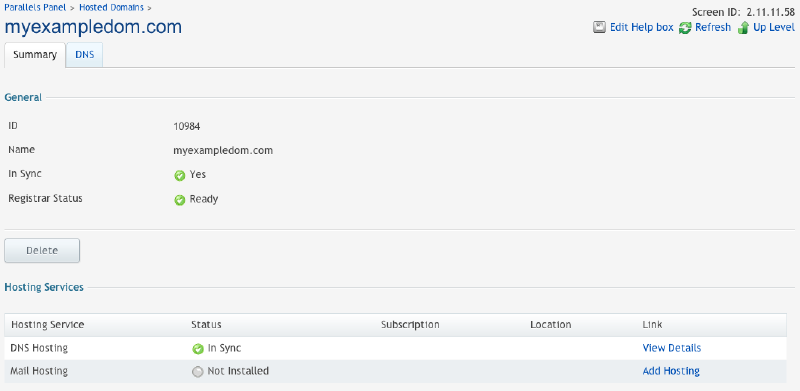
Step 1: Add Mail Hosting to existing domain
Add mail hosting to an existing domain, if not already done.
- When entering the Customer Control Panel (CCP), click on the "Hosted Domains" link
- Select the domain that should be used for Open-Xchange Webmail
- Click on "Add Hosting"
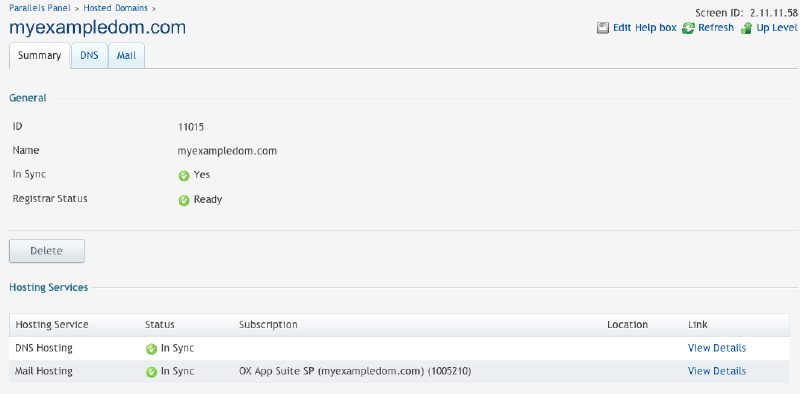
When everything went well, Mail Hosting status must be "In Sync".
Step 2: Create Open-Xchange Context
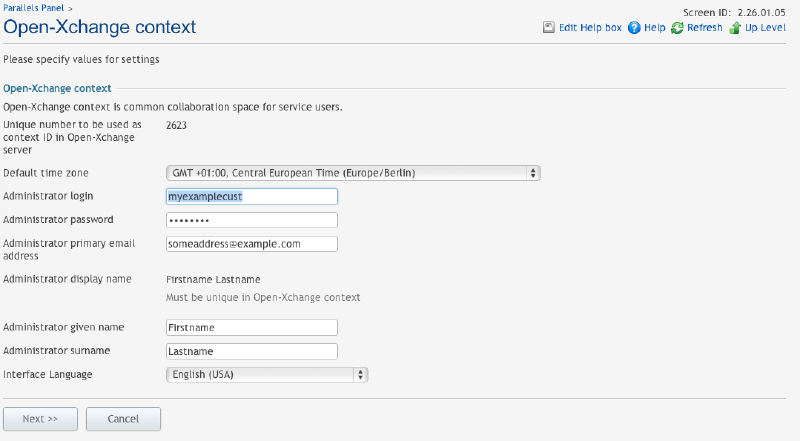
The next step in provisioning the Open-Xchange application is to create the Open-Xchange Context. The Context is the container for the webmail accounts. Click on "Create" to initiate the Context creation workflow.
The following data is pre-filled with your customer account data. You can leave it as it is. Just be aware that the "Administrator login" will be a first account in Open-Xchange and thus no further account can have this users Displayname, since the Displayname must be unique within the complete Open-Xchange context.
You can verify and the Context creation and the Admin settings now in clicking on the Open-Xchange tab.
- Click on General to see whether the context creation was successful. You can also login to the Open-Xchange server using the link shown on the bottom. Note: The Open-Xchange Administrator has no Mailbox and thus no access to emails.
- Click on Settings to review and change settings. Not all settings can be changed after creation of the Context. The Administrator login for instance cannot be changed anymore.
Open-Xchange Webmail User creation
To create a Webmail User in Open-Xchange, a service user must exist or be created. We assume there's no service user yet and thus will create one. Go to the Users tab and click on Add New Service User
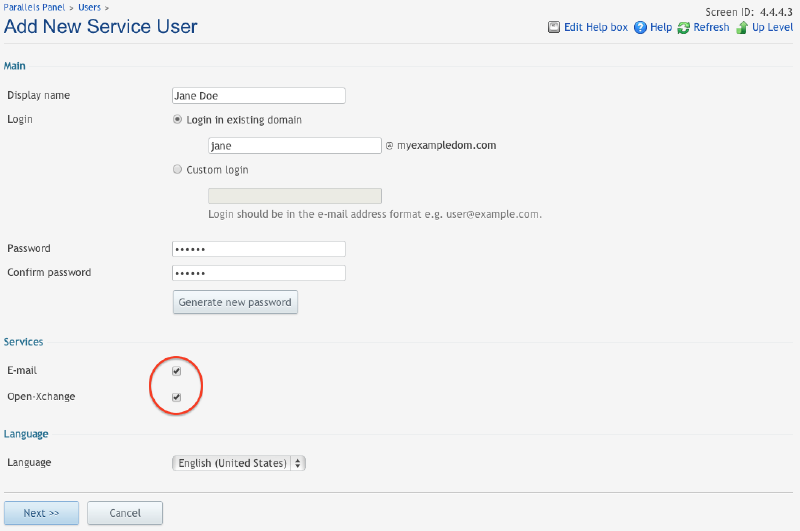
- In the first step, check E-Mail and Open-Xchange
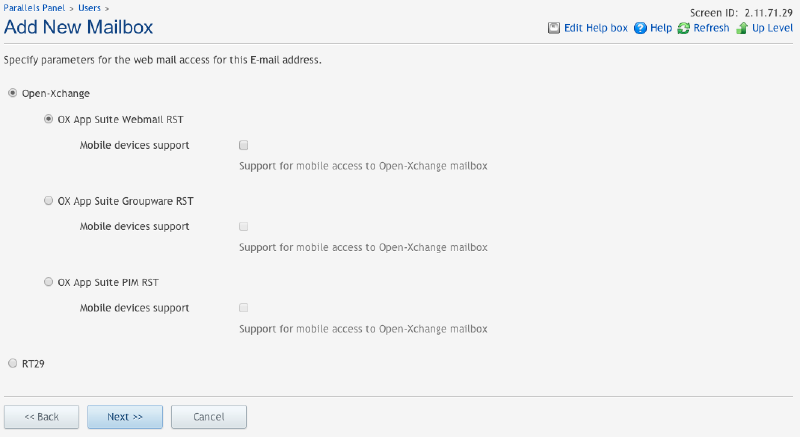
- Chose an E-Mail address
- Select the Service Template to use
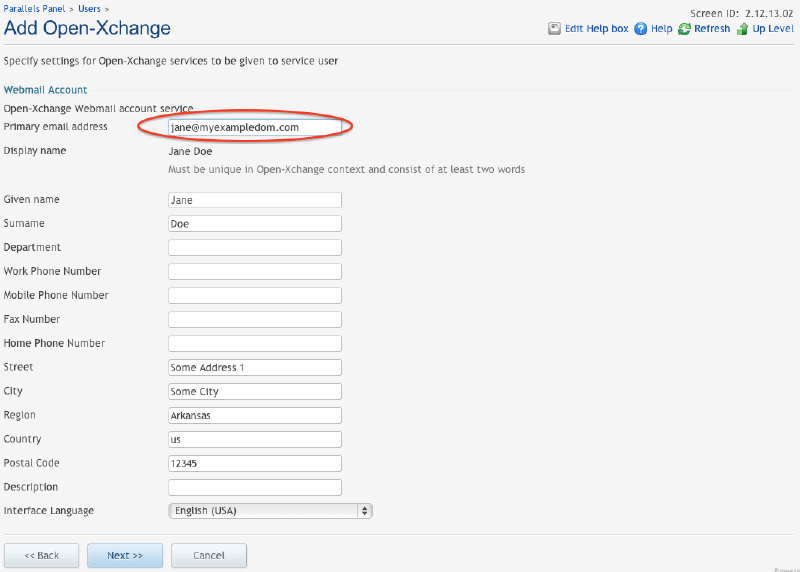
- In the final Open-Xchange part, use the same E-Mail address as in part 2
