Plesk Integration: Difference between revisions
| Line 103: | Line 103: | ||
$ /opt/open-xchange/sbin/listcontext -A oxadminmaster -P secret | $ /opt/open-xchange/sbin/listcontext -A oxadminmaster -P secret | ||
cid fid fname enabled qmax qused name lmappings CustomID Owner | cid fid fname enabled qmax qused name lmappings CustomID Owner | ||
19 2 19_ctx_store true 1024 0 pleskcustomer1_24 pleskcustomer1_24,BRANDING||24||[...] | 19 2 19_ctx_store true 1024 0 pleskcustomer1_24 pleskcustomer1_24,BRANDING||24||[...] pleskcustomer1 | ||
You can see, that we assigned the subadmin ''pleskcustomer1'' to this Plesk instances owner. In addition, the name of the context has been | You can see, that we assigned the subadmin ''pleskcustomer1'' to this Plesk instances owner. In addition, the name of the context has been | ||
Revision as of 09:31, 27 August 2013
Integrate Open-Xchange with Plesk
WORK IN PROGRESS
This document describes how to integrate Open-Xchange with Plesk.
Requirements
In order to integrate Open-Xchange with Plesk, the Open-Xchange APS package must be used. This requires the following versions of Plesk and the APS package:
- Open-Xchange APS package version 7.2 and above (Not yet available).
- Parallels Plesk Panel version 11.5 and above
Older versions are not supported.
Download
Download the APS package from the APS catalogue
Install and configure Open-Xchange
Before you continue, you have to find out your requirements on how to integrate your Plesk instance(s) with Open-Xchange. There are two possible scenarios:
- One Open-Xchange installation for one Plesk Installation
- You want to serve one Plesk system with one single Open-Xchange installation or you are the only one managing the Plesk servers.
- One Open-Xchange installation for many Plesk systems (Reseller Mode)
- You want to resell many Plesk systems but only use one single Open-Xchange installation.
Note: Finding the correct scenario is important as it is hard to change later!
The main problem is, that usually on Open-Xchange, you have ONE single "root" account to provision contexts/tenants in Open-Xchange. The name of this account is usually oxadminmaster, but it can be renamed to what ever you like. Now imagine there's a scenario where not you, but your customers should create contexts. This is usually the case when you are a reseller. In this case you do not want to hand out that single "root" account to all your customers.
Fortunately, Open-Xchange has a solution for that. It is called the Reseller_Bundle.
Roughly summarised, if you are a Reseller you most likely need Plesk_Integration#One_Open-Xchange_installation_fo_many_Plesk_systems
One Open-Xchange installation for one Plesk Installation
Follow one of the Open-Xchange installation guides to install Open-Xchange and in addition, install the following package:
open-xchange-parallels
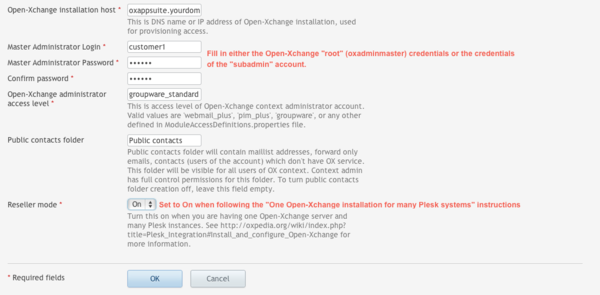
Now follow the instructions as written here Plesk_Integration#Plesk_Configuration. In this case, the Reseller Mode has to be kept off, which is the default of the APS package. The Master Administrator login is the Open-Xchange "root" account.
One Open-Xchange installation for many Plesk systems (Reseller Mode)
Follow one of the Open-Xchange installation guides to install Open-Xchange and in addition, install the following package:
open-xchange-parallels open-xchange-admin-soap-reseller
Create and manage subadmin accounts
As explained in more details in the article about the Reseller Bundle, you have to create subadmins that you can hand over to your individual Plesk customers/resellers. This article explains on how to do that using the command line as provided by Open-Xchange. Of course the same management can be done via SOAP and via RMI.
After you finished setting up Open-Xchange including the initialisation of the restrictions, you are ready to create a subadmin account. This article assumes that your "root" account name in Open-Xchange is oxadminmaster and it's password is secret. Please do NOT use this password in your environment!
Lets create two new admin accounts:
$ /opt/open-xchange/sbin/createadmin -A oxadminmaster -P secret -u pleskcustomer1 -p secret -d "My first customer"
$ /opt/open-xchange/sbin/createadmin -A oxadminmaster -P secret -u pleskcustomer2 -p secret -d "My second customer"
The login of these customers are pleskcustomer1 and pleskcustomer2, both receive the same password secret - again, do not use this password in production.
Now to list these accounts, run
$ /opt/open-xchange/sbin/listadmin -A oxadminmaster -P secret
Id Name           Displayname        Parent Restrictions
39 pleskcustomer1 My first customer  0
40 pleskcustomer2 My second customer 0
You can apply restrictions to these accounts as well. We can for example create a third user, which is only allowed to create 100 contexts:
$ /opt/open-xchange/sbin/createadmin -A oxadminmaster -P secret -u pleskcustomer3 -p secret -d "My third customer" \
   -a Subadmin.MaxContext=100
$ /opt/open-xchange/sbin/listadmin -A oxadminmaster -P secret
Id Name           Displayname        Parent Restrictions
39 pleskcustomer1 My first customer  0
40 pleskcustomer2 My second customer 0
41 pleskcustomer3 My third customer  0      Subadmin.MaxContext=100
Please refer to the Reseller Bundle documentation for more restrictions and further details.
Manage Contexts created via Open-Xchange APS package in Plesk
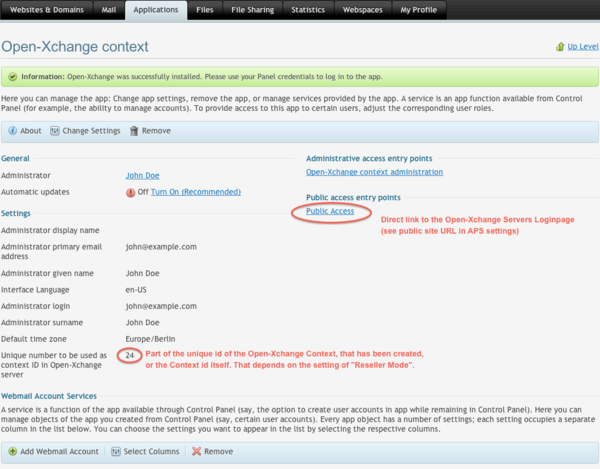
See Plesk_Integration#Plesk_Configuration_.28Admin_Role.29 below on how customers create contexts via Plesk. This article assumes we are having a Plesk WebMaster account named john@example.com. Once that user installed the application for the domain example.com, we will see the following:
$ /opt/open-xchange/sbin/listcontext -A oxadminmaster -P secret
cid fid fname        enabled qmax qused name              lmappings                                                       CustomID         Owner
19   2 19_ctx_store true    1024     0 pleskcustomer1_24 pleskcustomer1_24,BRANDING||24||[...]                             pleskcustomer1
You can see, that we assigned the subadmin pleskcustomer1 to this Plesk instances owner. In addition, the name of the context has been generated as pleskcustomer1_24. This is happening in the Reseller Mode only. When this mode is turned off, the context name is the context id.
General Open-Xchange Configuration
Add the parameter
com.openexchange.login.formLoginWithoutAuthId=true
to /opt/open-xchange/etc/login.properties
Plesk Configuration (Admin Role)
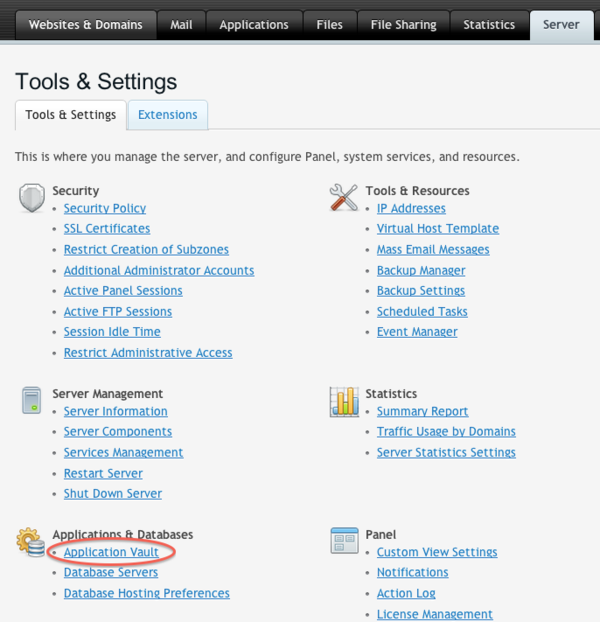
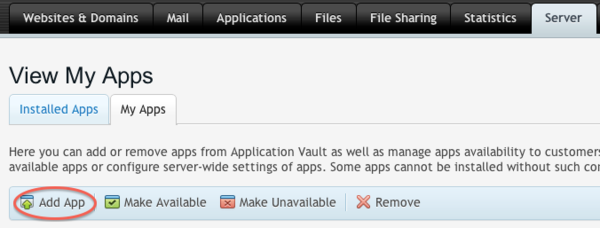
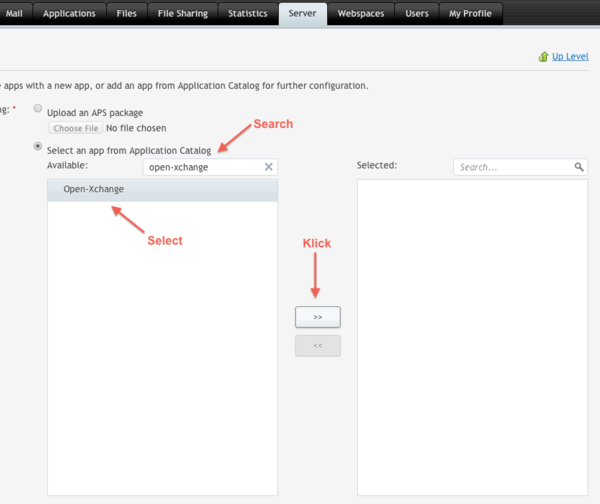
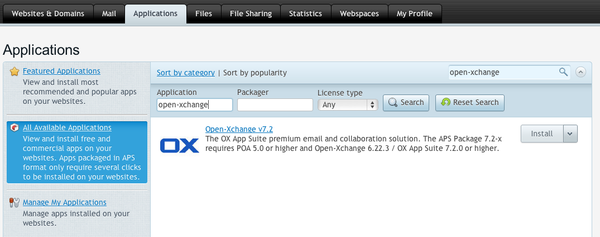
Add Application via Application Vault
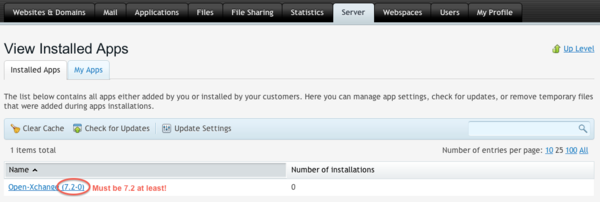
Check version requirement
Check that the version of the APS package is at least 7.2. Older versions are neither supported nor will they work in all circumstances.
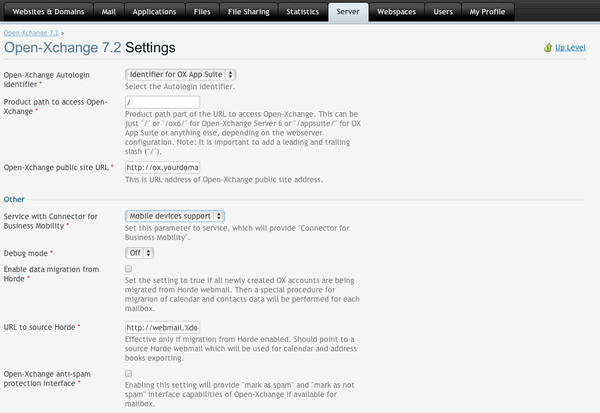
Set up the Open-Xchange package
Plesk Configuration (Webmaster Role)
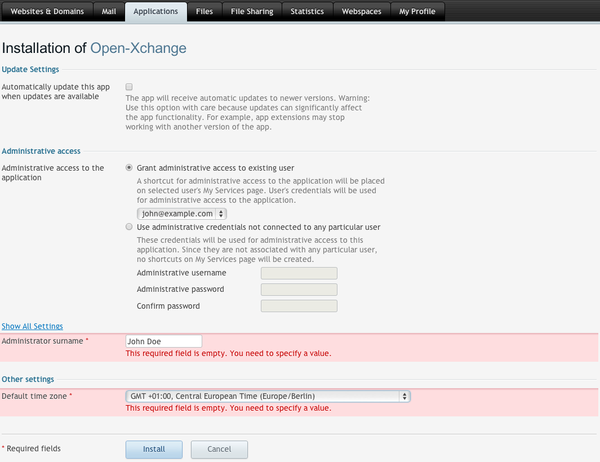
Once the Plesk Admin installed and configured the Open-Xchange APS package, you can e.g. assign a user the Webmaster role to install that application into one or more domains.
Understanding the Open-Xchange specific configuration data
Debugging
Plesk
Plesk errors can be found in /usr/local/psa/admin/logs/panel.log. If you turn on Debug mode in the APS package settings, you see even more information, but do NOT turn it on in production permanently.
To have even more information, do the following on your Plesk system:
$ cd /usr/local/psa/admin/conf/
$ mv panel.ini.sample panel.ini
and set
[log]
filter.priority = 7
Open-Xchange
Open-Xchange errors can usually be found in /var/log/open-xchange/open-xchange.log.0.
