PA OXaaS APSv2 Provider Guide: Difference between revisions
| Line 511: | Line 511: | ||
==== Template Creation==== | ==== Template Creation==== | ||
'''Please ensure that Parallels Business Automation resource has been created (see Deployment Guide, section “Prerequisites for the endpoint” for further details). | |||
''' | |||
# In the POA Provider Control Panel, navigate '''Products>Service Templates'''. | # In the POA Provider Control Panel, navigate '''Products>Service Templates'''. | ||
Revision as of 15:21, 16 December 2015
Provider Guide for the OX as a Service APSv2 package into Odin Service Automation
This APS 2.0 package is only for the Open-Xchange own OXaaS platform or similar respective compatible deployments or copies of this platform. The package is designed for syndication and on-premise customers with Odin Service Automation 5.5 and higher.
This guide describes the integration of Odin Service Automation with Open-Xchange services. This document was developed by Odin Service Automation. For additional information, please contact support@odin.com.
Terms and Abbreviations
Below is the list of concepts and abbreviations you will find in this page.
| Abbreviation | Definition |
| API | Application Programming Interface |
| APS | Application Packaging Standard, an open standard that was designed to simplify the delivery of SaaS applications in the cloud-computing industry. |
| CSV | Comma-Separated Values |
| CRUD | Create, Read, Update, Delete |
| KB | KiloByte |
| OSA | Odin Service Automation (former Parallels Automation), which includes both POA and PBA |
| OX | Open-Xchange |
| PBA | Parallels Business Automation |
| POA | Parallels Operations Automation |
| SaaS | Software as Service |
| SSO | Single Sign On |
| URL | Uniform Resource Locator |
Requirements
The APS Package v1.1-9 requires POA 5.5 or higher and OX App Suite 7.2.1 or higher.
Business Model Overview
About Open-Xchange
The standard business model of Open-Xchange consists of two major components: a platform fee and a revenue share. With the platform fee the customer pays the basic access to the hosted service or the software and it usually includes a certain amount of basic packages that are ideally distributed to a wide audience of users by bundling them into other products.
Open-Xchange Services Provided
Below is the list of resources provided by Open-Xchange:
| Resource Name | Resource Class | Limit | Auto-Provide |
| OX Globals | Application Service Reference | 1 | No |
| OX Brand | Application Service Reference | 1 | No |
| OX Profile Webmail | Application Service Reference | Unlimited | No |
| OX Profile Basic | Application Service Reference | Unlimited | No |
| OX Profile Advanced | Application Service Reference | Unlimited | No |
| OX Profile Pro | Application Service Reference | Unlimited | No |
| OX Shared Domain* | Application Service Reference | Unlimited | No |
| OX Shared Subdomain* | Application Service Reference | Unlimited | No |
| Odin Business Automation | Application Service Reference | 1 | No |
| OX Tenant | Application Service | 1 | Yes |
| OX User | Application Service | Unlimited | No |
| OX Email Address | Application Service | Unlimited | No |
| OX Domain | Application Service | Unlimited | No |
| OX Purchase Request | Application Service | Unlimited | No |
| OX Group | Application Service | Unlimited | No |
| OX Subdomain | Application Service | Unlimited | No |
| OX Resource | Application Service | Unlimited | No |
| OX Storage Quota | Application Counter (KB) | Unlimited | No |
- You can add as many as necessary.
Integration Workflow
The integration workflow looks as follows:
Deployment
Please refer to the Deployment Guide for more detailed information. This action is performed once and consists of:
- Deploying Open-Xchange application endpoint.
- Importing Open-Xchange application package.
- Creating service instance in the Provider Control Panel.
OSA Integration
- Creating the required resource types. For further details, please refer to the Resource Creation section of this guide.
- Creating the service template. For further details, please refer to the Service Template Creation section of this guide.
Localization List
Open-Xchange has been localized in the following languages for each category:
- Customer Interface: English
- OSA task manager error logging: English
- Open-Xchange API error messaging: English
Technical Overview
This section contains an outline of how the integration of Open-Xchange and OSA is performed and the list of Open-Xchange features that are supported within the integration package.
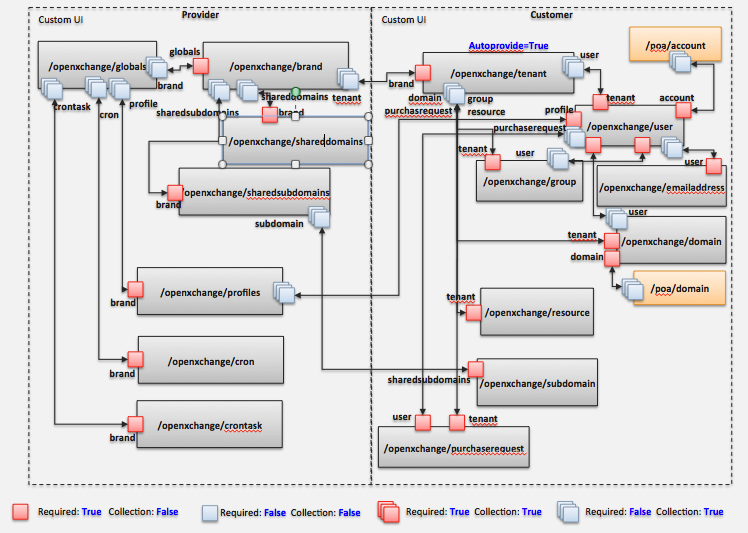
General Architecture
The following scheme represents the architecture of POA and Open-Xchange integration:
Components
The following table shows the main actions offered by the APS through the different panels of OSA.
| Components | Actions |
| Odin Admin |
|
| Odin Customer Manager |
|
| Odin Service User |
|
Download
APS package
Download the APS package from the APS catalog: http://dev.apsstandard.org/apps/2.0/Open-Xchange/Open-Xchange/Mamasu/
Open-Xchange
Please contact Open-Xchange for further download and configuration information via info@open-xchange.com.
OSA Integration
Configuring Services for Selling - POA
Learn about how to configure the service templates that are necessary to create Open-Xchange APS subscriptions for sale.
Instance Configuration
Minimum Instance Configuration
In order to configure the instance, the following minimum steps need to be observed:
- Configure the settings (please refer to the APP Settings subsection, under the Detailed Configuration section).
- Configure the reseller’s brands (please refer to the Brands subsection, under the Detailed Configuration section).
- Configure the profiles (please refer to the Profiles subsection, under the Detailed Configuration section). The type of profiles that needs to be created in a common OX configuration are “Webmail”, “Basic”, “Advanced”, “Pro”. Profiles and profiles’ configuration values of each one need to be provided by OX.
Detailed Instance Configuration
A description follows on how to configure all the specific settings of this particular instance.
- Accessing the Instance
- In the POA Provider Control Panel, navigate to Services>Applications.
- Click on the latest version of the Open-Xchange APS package.
- Go to the Instances tab.
- Click Open-Xchange.
- App Settings
On this tab the list of possible scripts that can be configured as background tasks for this Open-Xchange APS2 is displayed. These scripts are used to create the reports.

- You can see the script name, file, next execution, period as well as their status, which can be:
- In order to create a cron, click Create. As soon as it is ready the status will change to “Enabled”, then it can also be Disabled, Edited or Deleted.
- This tab also shows the last 10 cron executions to check their current status.
- The status of the executions can be:
 : the execution was successful.
 : the execution is in process.
 : an error has occurred during the execution.
- Brands
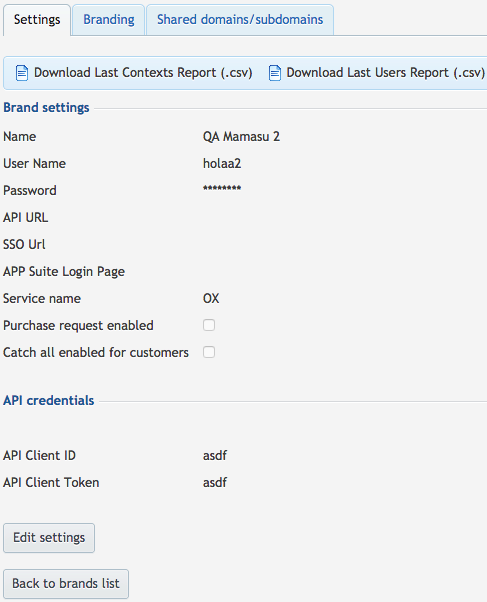
This tab is used to assign each Open-Xchange reseller with a brand. To do so:
- Click on Add new brand.
- Fill in the required fields:
- Name: name of the brand.
- Username: username of the brand.
- Password: password or the brand.
- API URL: URL where the API is located.
- SSO URL: URL of the Single Sign On.
- APP Suite Login Page: login page of the APP Suite.
- Label of service name: name that will be displayed on all buttons and tabs and refers to the service. It could be “App Suite”, but if the provider has his own service name, which is used for his brand, it can also be defined here.
- Select “Purchase request enabled” and “Catch all enabled for customers”, if appropriate. If the first option is enabled users are allowed to request customers some extra resources or services. The second one is to enable or disable the use of a catch all email in customers’ domains.
- Click on Create to add the brand.
- Once the brand has been created, you can view or edit the settings, branding and list of domains and subdomains.

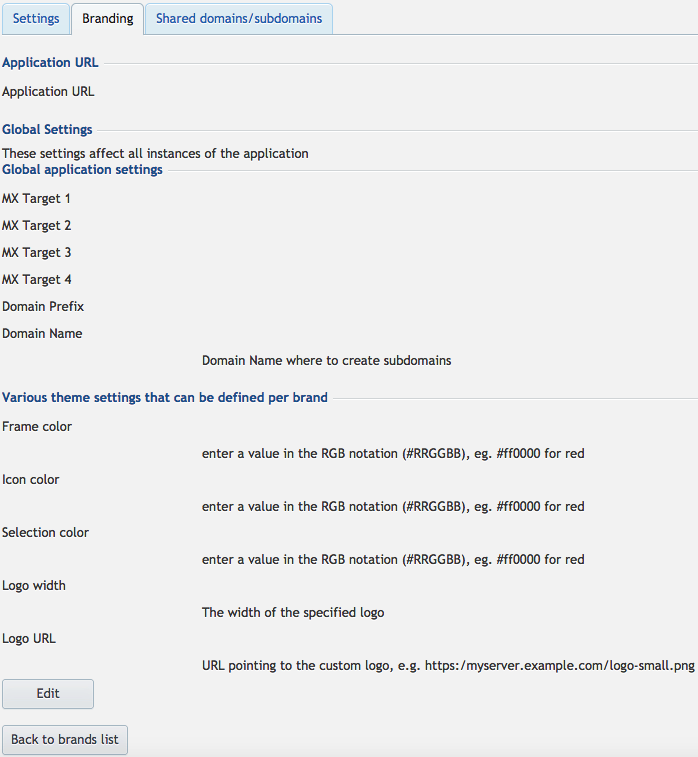
- By clicking on View, you can:
- Set the branding settings, all of them are optionnal:
- Application URL: Passed to the OX API. It accepts 4 differents type of application URL. Type and value has to be provided by OX.
- URL path of brand website: The value corresponds to the suffix: oxaasbrand.org/{value}
- Subdomain of brand domain: The value corresponds to the subdomain: {value}.oxaasbrand.org
- Custom URL: The value corresponds to the full domain of the application URL
- None: No application URL used
- MX target 1: Not mandatory. It has to be provided by OX.
- MX target 2: Not mandatory. It has to be provided by OX.
- MX target 3: Not mandatory. It has to be provided by OX.
- MX target 4: Not mandatory. It has to be provided by OX.
- Domain prefix: Not mandatory. It has to be provided by OX.
- Domain name: Not mandatory. It has to be provided by OX.
- Frame Color: Frame color of the embedded OX interface.
- Icon Color: Icon color of the embedded OX interface.
- Selection Color: Selection color of the embedded OX interface.
- Logo width: width of the embedded OX interface.
- Logo URL: URL of the logo of the embedded OX interface.
- Add, edit or delete the reseller’s shared domains and subdomains:
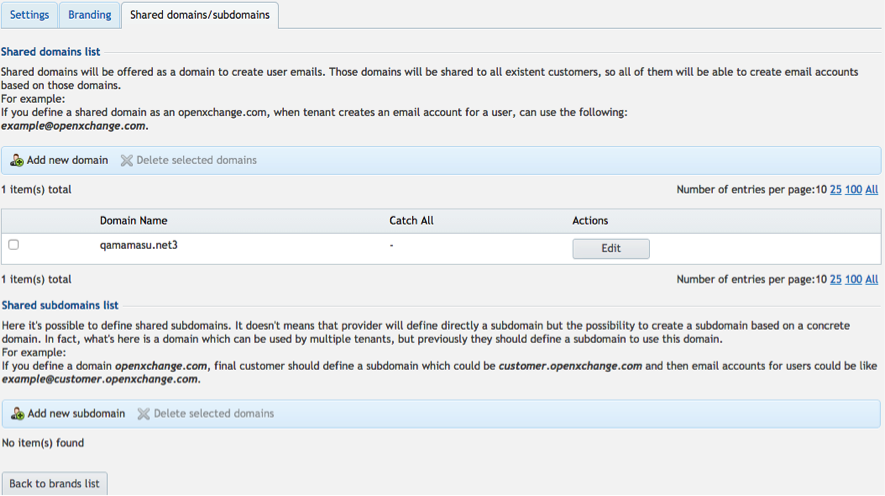
- Profiles
On this tab you can add, edit and delete a profile.

Click on Add new profile and specify the following features, then click on Save.
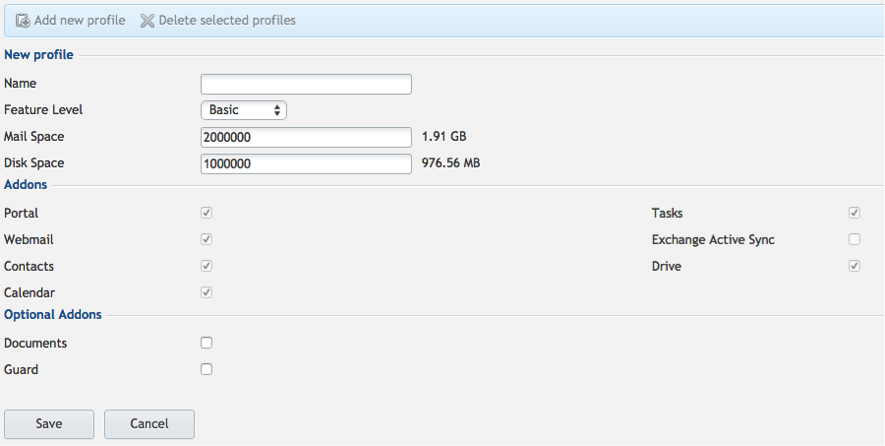
- Name: profile name.
- Feature level: select the level from the drop-down list.
- Mail quota: mail quota provided (defined in KB).
- Disk quota: disk quota provided (defined in KB).
- Feature level defines a preset of add-ons, but two additional add-ons can be enabled apart from the predefined list. These are:
- Documents.
- Guard.
Resource Creation
- In the POA Provider Control Panel, navigate Services>Applications.
- Click Open-Xchange in the APS Packages tab.
- Go to the Resource Types tab.
Application Service Reference
- Creating a Globals Resource
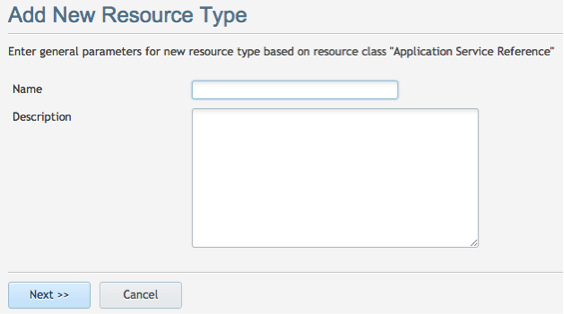
- Click on Create, then on Application Service Reference.
- Fill in the following fields:
- Click Next, then select Open-Xchange Application as the APS type.
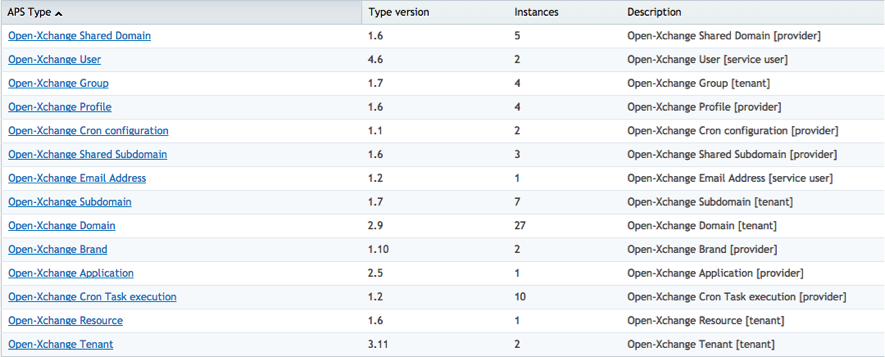
- Click on the instance.

- Click Finish. The resource has been created.
- Creating a Brand Resource
- Click on Create, then on Application Service Reference.
- Fill in the following fields:
- Name: enter the name of the application and the type of resource. In this case, Open-Xchange Brand.
- Description: this field is used to describe the type of resource. You can leave it blank or enter the information you wish.
- Click Next, select Open-Xchange Brand as the APS type and then click on the instance.
- Click Finish. The resource has been created.
- Creating a Profile Basic Resource
- Click on Create, then on Application Service Reference.
- Fill in the following fields:
- Name: enter the name of the application and the type of resource. In this case, Open-Xchange Profile Basic.
- Description: this field is used to describe the type of resource. You can leave it blank or enter the information you wish.
- Click Next, select Open-Xchange Profile as the APS type and click on the instance.
- Click Finish. The resource has been created.
- Creating a Profile Webmail Resource
- Click on Create, then on Application Service Reference.
- Fill in the following fields:
- Name: enter the name of the application and the type of resource. In this case, Open-Xchange Profile Webmail.
- Description: this field is used to describe the type of resource. You can leave it blank or enter the information you wish.
- Click Next, select Open-Xchange Profile as the APS type and then click on the instance.
- Click Finish. The resource has been created.
- Creating a Profile Advanced Resource
- Click on Create, then on Application Service Reference.
- Fill in the following fields:
- Name: enter the name of the application and the type of resource. In this case, Open-Xchange Profile Advanced.
- Description: this field is used to describe the type of resource. You can leave it blank or enter the information you wish.
- Click Next, select Open-Xchange Profile as the APS type and then click on the instance.
- Click Finish. The resource has been created.
- Creating a Profile Pro Resource
- Click on Create, then on Application Service Reference.
- Fill in the following fields:
- Name: enter the name of the application and the type of resource. In this case, Open-Xchange Profile Pro.
- Description: this field is used to describe the type of resource. You can leave it blank or enter the information you wish.
- Click Next, select Open-Xchange Profile as the APS type and then click on the instance.
- Click Finish The resource has been created.
- Creating a Shared Domain Resource
- Click on Create, then on Application Service Reference.
- Fill in the following fields:
- Name: enter the name of the application and the type of resource. In this case, Open-Xchange Shared Domain.
- Description: this field is used to describe the type of resource. You can leave it blank or enter the information you wish.
- Click Next, select Open-Xchange Shared Domain as the APS type and then click on the instance.
- Click Finish. The resource has been created.
NOTE: Please remember that you can add as many Shared Domain resources as necessary.
- Creating a Shared Subdomain Resource
- Click on Create, then on Application Service Reference.
- Fill in the following fields:
- Name: enter the name of the application and the type of resource. In this case, Open-Xchange Shared Subdomain.
- Description: this field is used to describe the type of resource. You can leave it blank or enter the information you wish.
- Click Next, select Open-Xchange Shared Subdomain as the APS type and then click on the instance.
- Click Finish. The resource has been created.
NOTE: Please remember that you can add as many Shared Subdomain resources as necessary.
Application Service
- Creating a Tenant Resource
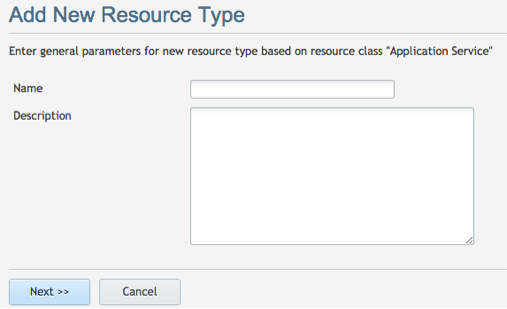
- Click on Create, then on Application Service.
- Fill in the following fields:
- Click Next, then select Open-Xchange Tenant as the APS type.

- Tick the “Automatically provision service” checkbox and leave the Priority field blank
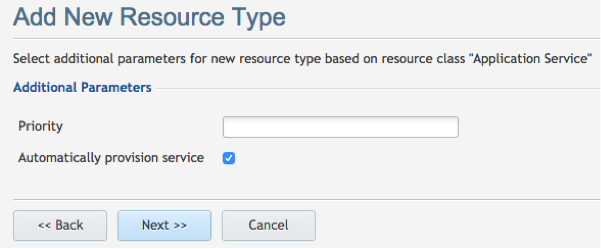
- Click Next, then Finish. The resource has been added.
- Creating a User Resource
- Click on Create, then on Application Service.
- Fill in the following fields:
- Name: enter the name of the application and the type of resource. In this case, Open-Xchange User.
- *Description: this field is used to describe the type of resource. You can leave it blank or enter the information you wish.
- Click Next, then select Open-Xchange User as the APS type.
- Leave the “Automatically provision service” box unchecked and the Priority field blank.
- Click Next, then Finish. The resource has been added.
- Creating an Email Address Resource
- Click on Create, then on Application Service.
- Fill in the following fields:
- Name: enter the name of the application and the type of resource. In this case, Open-Xchange Email Address.
- Description: this field is used to describe the type of resource. You can leave it blank or enter the information you wish.
- Click Next, then select Open-Xchange Email Address as the APS type.
- Leave the “Automatically provision service” box unchecked and the Priority field blank.
- Click Next, then Finish. The resource has been added.
- Creating a Domain Resource
- Click on Create, then on Application Service.
- Fill in the following fields:
- Name: enter the name of the application and the type of resource. In this case, Open-Xchange Domain.
- Description: this field is used to describe the type of resource. You can leave it blank or enter the information you wish.
- Click Next, then select Open-Xchange Domain as the APS type.
- Leave the “Automatically provision service” box unchecked and the Priority field blank.
- Click Next, then Finish. The resource has been added.
- Creating a Purchase Request Resource
- Click on Create, then on Application Service.
- Fill in the following fields:
- Name: enter the name of the application and the type of resource. In this case, Open-Xchange Purchase Request.
- Description: this field is used to describe the type of resource. You can leave it blank or enter the information you wish.
- Click Next, then select Open-Xchange Purchase Request as the APS type.
- Leave the “Automatically provision service” box unchecked and the Priority field blank.
- Click Next, then Finish. The resource has been added.
- Creating a Group Resource
- Click on Create, then on Application Service.
- Fill in the following fields:
- Name: enter the name of the application and the type of resource. In this case, Open-Xchange Group.
- Description: this field is used to describe the type of resource. You can leave it blank or enter the information you wish.
- Click Next, then select Open-Xchange Group as the APS type.
- Leave the “Automatically provision service” box unchecked and the Priority field blank.
- Click Next, then Finish. The resource has been added.
- Creating a Subdomain Resource
- Click on Create, then on Application Service.
- Fill in the following fields:
- Name: enter the name of the application and the type of resource. In this case, Open-Xchange Subdomain.
- Description: this field is used to describe the type of resource. You can leave it blank or enter the information you wish.
- Click Next, then select Open-Xchange Subdomain as the APS type.
- Leave the “Automatically provision service” box unchecked and the Priority field blank.
- Click Next, then Finish. The resource has been added.
- Creating a Resource Resource
- Click on Create, then on Application Service.
- Fill in the following fields:
- Name: enter the name of the application and the type of resource. In this case, Resource Resource.
- Description: this field is used to describe the type of resource. You can leave it blank or enter the information you wish.
- Click Next, then select Open-Xchange Resource as the APS type.
- Leave the “Automatically provision service” box unchecked and the Priority field blank.
- Click Next, then Finish. The resource has been added.
Application Counter
- Creating a Storage Quota Resource
- Click on Create, then on Application Counter (KB).
- Fill in the following fields:
- Name: enter the name of the application and the type of resource. In this case, Open-Xchange Storage Quota.
- Description: this field is used to describe the type of resource. You can leave it blank or enter the information you wish.
- Click Next, then select Tenant Storage Quota as the APS type.
- Click Finish. The resource has been added.
Template Creation
Please ensure that Parallels Business Automation resource has been created (see Deployment Guide, section “Prerequisites for the endpoint” for further details).
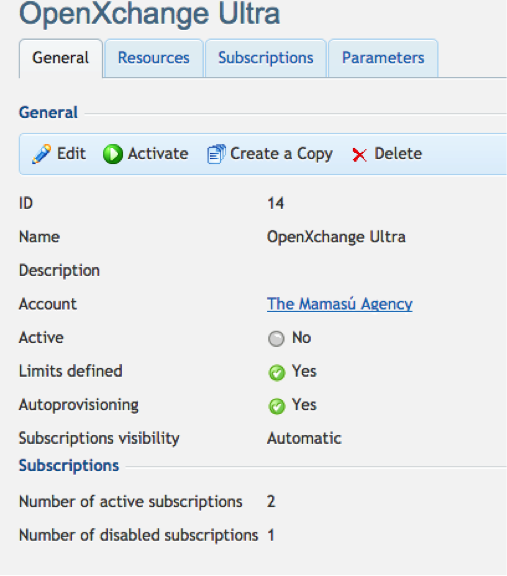
- In the POA Provider Control Panel, navigate Products>Service Templates.
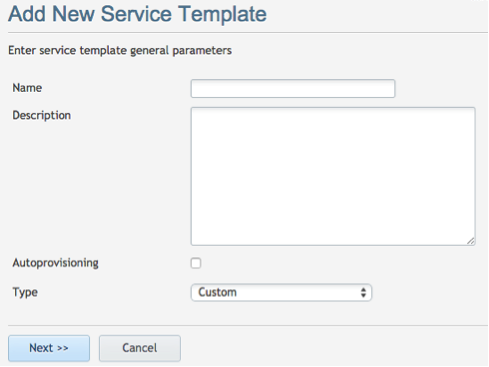
- Click on the Add New Service Template button.
- Configure the service template’s general parameters:
- Click Next. The template has been created.
- Select all the resources created earlier as well as Odin Business Automation, then click Next.
- Set the limits for the resource types included in the service template.
- For Globals, Brand, Tenant and Odin Business Automation uncheck the Unlimited checkbox and set the limit as 1.
- For the rest of resources, leave the Unlimited checkbox marked.
- Click Next, then Finish
- To activate the service template:
- Open the newly created service template (Open-Xchange).
- In the General tab, click on Activate.
