OX6:Gui Theming Description: Difference between revisions
(→Style) |
(→Style) |
||
| Line 60: | Line 60: | ||
[[Image:Cut calendar month.jpg|thumb|150px|none|Calendar Month View]] | [[Image:Cut calendar month.jpg|thumb|150px|none|Calendar Month View]] | ||
# | #wholeDayBackground | ||
# | #appointmentTEMPORARY | ||
# | #appointmentRESERVED | ||
#appointmentABSENT | |||
#appointmentFREE | |||
#workTimeBackground | |||
#offTimeBackground | |||
| Line 69: | Line 73: | ||
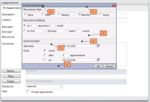
[[Image:Cut calendar new.jpg|thumb|150px|none|New Appointment]] | [[Image:Cut calendar new.jpg|thumb|150px|none|New Appointment]] | ||
# | #background-color-additional-content | ||
# | #font-color-disabled | ||
# | #border-color-design | ||
#border-color-content-default | |||
#background-color-content | |||
#font-style-lable | |||
#background-color-default | |||
| Line 78: | Line 86: | ||
[[Image:Cut calendar new serie.jpg|thumb|150px|none|New Appointment Series]] | [[Image:Cut calendar new serie.jpg|thumb|150px|none|New Appointment Series]] | ||
# | #popupHeaderBackground | ||
# | #popup-header | ||
# | #greywrapper | ||
#background-color-additional-content | |||
#border-color-design | |||
#popupBackground | |||
=== Calendar Week View === | === Calendar Week View === | ||
| Line 87: | Line 97: | ||
[[Image:Cut calendar week.jpg|thumb|150px|none|Calendar Week View]] | [[Image:Cut calendar week.jpg|thumb|150px|none|Calendar Week View]] | ||
# | #border-color-design | ||
# | #font-style-low | ||
| Line 96: | Line 105: | ||
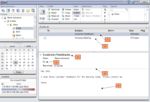
[[Image:Cut mail.jpg|thumb|150px|none|Mail View]] | [[Image:Cut mail.jpg|thumb|150px|none|Mail View]] | ||
# | #selected | ||
# | #tr | ||
# | #font-style-big-headline | ||
#font-style-lable | |||
#border-color-design | |||
#defaultContainer | |||
== Setup description == | == Setup description == | ||
Revision as of 12:48, 19 June 2008
Introduction
Open-Xchange SP4 will support theming functionality, so that you will be able to create own themes and make them available in the configuration frontend of the Open-Xchange Webinterface. The stylesheet files have been modified with SP4, so that everything that should affect the theming functionality can now be configured within an own theme. Besides also the images can be replaced per theme.
Creating an Open-Xchange Theme
All themes will be stored in the following directory of the Open-Xchange Server:
/var/www/ox6/themes/
Per default you will have at least three themes in this directory: darkseagreen, default and ochre. The easiest way to start with your own theme is to copy the default theme with:
cp -r /var/www/ox6/themes/default /var/www/ox6/themes/[YOUR_THEME_NAME]
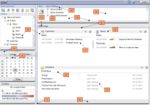
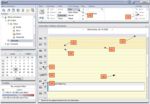
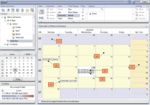
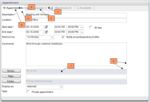
Now, you should start modifying your theme, by editing the stylesheet files in /var/www/ox6/themes/[YOUR_THEME_NAME]/css, and exchanging the images from /var/www/ox6/themes/[YOUR_THEME_NAME]/images. The following screenshots will give you an overview of the stylesheet structure, and which tags have to be modified in order to get your theme customized:
Style
Open the Open-Xchange css files for this changes.
The Portal Page
- <body> .background-color
- cpbottom-color
- font-color-disabled
- font-style-headline
- background-color-additional-content
- border-background-default
- font-color-default
- font-style-lable
- font-color-header
- cpheader-color
- font-style-headline
- border-color-design
- background-color-content
- font-color-header
- topHeaderBG
The Calendar Page
- font-color-disabled
- wholeDayBackground
- background-color-PMG-selection-elements
- offTimeBackground
- strokeCalendar
- sectionStrokeCalendar
- border-color-image
- font-style-big-headline
- kwSeperationBackGround
- workTimeBackground
Calendar Month View
- wholeDayBackground
- appointmentTEMPORARY
- appointmentRESERVED
- appointmentABSENT
- appointmentFREE
- workTimeBackground
- offTimeBackground
New Appointment
- background-color-additional-content
- font-color-disabled
- border-color-design
- border-color-content-default
- background-color-content
- font-style-lable
- background-color-default
New Appointment Series
- popupHeaderBackground
- popup-header
- greywrapper
- background-color-additional-content
- border-color-design
- popupBackground
Calendar Week View
- border-color-design
- font-style-low
Mail View
- selected
- tr
- font-style-big-headline
- font-style-lable
- border-color-design
- defaultContainer
Setup description
After you have created and modified your theme, you should make those theme available in the configuration interface for users of the Open-Xchange Server. To do that, you only have to manifest your theme in the following server configuration file, afterwards your users can select your theme:
/opt/open-xchange/etc/groupware/themes.properties
Each key in this property file must be prefixed with the theme bundle identifier. This is "com.openexchange.themes". The prefix must be followed with the unique identifier of a theme. This unique identifier specifies the directory name of the theme on the web server (/var/www/ox6/themes/ per default), too. The value of the property can be any name to described the theme. This name will be displayed in the AJAX GUI for selecting a theme. For example you should add the following line to this configuration file:
com.openexchange.themes.[YOUR_THEME_NAME]=[YOUR_THEME_DESCRIPTION]
Afterwards, restart the Open-Xchange service groupware. Your users can now select your theme.
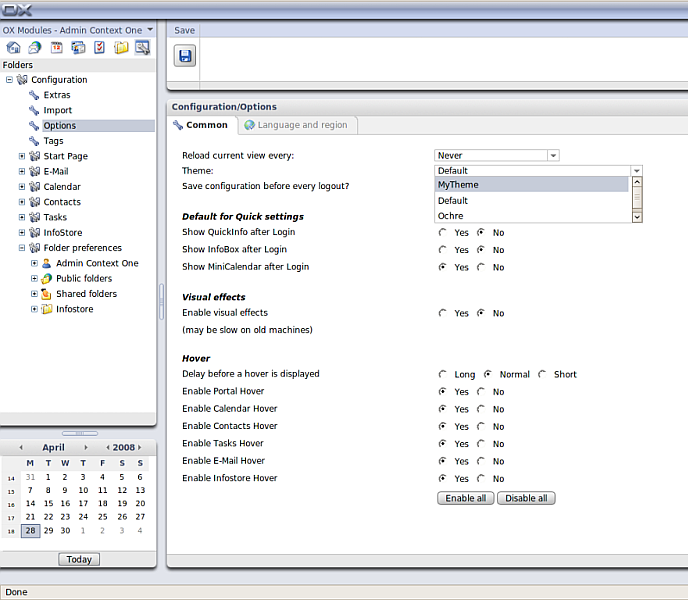
End user view
After you have created and configured your theme, your users will be able to select it in the configuration frontend:
