SetUpThunderbirdLightningCalDAVClient
CalDAV access via Thunderbird/Lightning
This article describes how the Open-Xchange server can be accessed via its CalDAV interface using the Mozilla Thunderbird client with the Lightning Add-on.
Prerequisites
Please ensure that the following preconditions are met before continuing:
- The server has to be configured to support CalDAV / CardDAV as described in Caldav_carddav_Bundles in order to let this work
- Latest versions of the Mozilla Thunderbird E-Mail client and the Lightning Add-on (check https://addons.mozilla.org/thunderbird/addon/lightning/ and http://www.mozilla.org/thunderbird/ for details)
- In the Mozilla Thunderbird client, an E-Mail account for the user's Open-Xchange mailbox needs to be setup before configuring the CalDAV access
Discover the CalDAV URL of your Calendar Folders
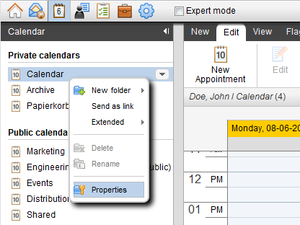
In contrast to some other clients, Thunderbird/Lightning is not able to discover all the available calendar collections automatically. Instead, each calendar folder needs to be added seperately in the client. To do so, one needs to know the CalDAV URLs of the calendar folder that should be synchronized with the client. This URL is displayed in the properties-page in the Groupware web-interface.
| |
|
Add a Calendar in Thunderbird/Lightning
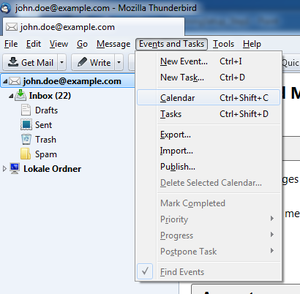
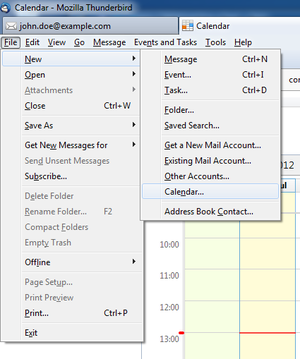
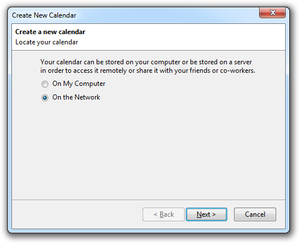
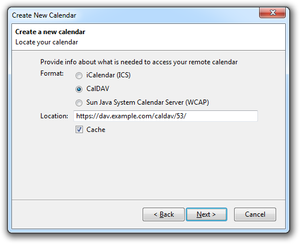
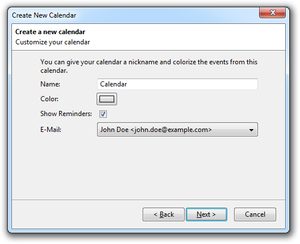
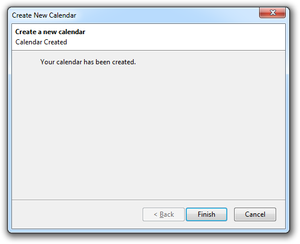
As already mentioned, each Calendar folder that should be sychronized has to be added separately in the client. The following steps show how to add a Calendar in Thunderbird/Lightning. Before starting, ensure that the client is connected to the network and the server can be accessed.
| |
| |
| |
| |
| |
|
Limitations
Please consider the following known limitations when synchronizing your calendar folders via Thunderbird/Lightning:
Reminders
- While the iCalendar standard allows to set appointment reminders past due an appointment's start-date, the OX server is not able to save such alarm times and discards them.
- Multiple reminders in an event are not supported by the OX server and are discarded.
- Only reminders of type "DISPLAY" are supported by the OX server, reminders of other iCal types are discarded.
- When dismissing reminders of recurring appointments in the Mozilla Lightning client, the reminder is removed from the whole recurring appointment object, since it's not possible to determine to which occurrence the dismiss action belongs to.
Unsupported Properties
- The "URL" property for iCal resources is not supported by the OX server and is discarded.
- Importing or exporting file attachments (property "ATTACH") is not supported via the CalDAV interface
Private Appointments
- Appointments classified as "private" are exported by the server with the "CLASS" property set to "PRIVATE"
- iCal events with the "CLASS" property set to either "CONFIDENTIAL" or "PRIVATE" are treated in the same way by the server and are imported as "private" appointments
- Since "private" appointments with participants are not supported by the server, saving such an appointment results in the participants being removed implicitly during import.
Debug Options
In case of synchronization problems, the built-in error console of Mozilla Thunderbird may provide valuable information. The error console can be opened via "Tools" -> "Error Console". To increase the loglevel of the Lightning Add-on, open the config editor by selecting "Tools" -> "Options..." -> "Advanced" -> "Config Editor..." and set the properties "calendar.debug.log" and "calendar.debug.log.verbose" to "true".
